for the children

A wickedly lovely Halloween to you and you and you. . . . . .

I asked Sarah if she was a little witch today and she said, “You can be the witch.  I will be your cat.”

Therefore, I’m snuggled on the couch with a Sarah-cat on one side and a real-cat on my lap.  The real-cat is not Black.  When I ordered him from my Witch-Supplies Catalogue, I was certain I had checked off “Midnight Black”, but when he arrived he was as gray as the most foggiest of dismal mornings, but otherwise the very best witch’s cat companion as could be, so we kept him of course.

The sun is slowly coming up in a cloudy sky, clouds as gray as my gray cat.

Spooky beings fly by the house, not on brooms, but in cars.

It’s scary out there.

But the most scariest of all??????

No school for my little offspring.   “BOOoooooooo” they cry.

The weather was positively scary on Sunday night, the wind moaned and pushed, and as tree-pruning by wind power is most unpredictable, the roads are covered in debris— no school Monday or Today.

*********

So I write with inky words, the tale of Aunt Amanda-Witch’s Halloween Party.

IMG_8815

Aunt Amanda-Witch

She isn’t scary ALL the time, just some of the time.

She planned and she planned, she visited a few stores and bought supplies 70 percent off!  Good witches always spend their money wisely.

She set to work, happily making her party as nice as she could, and invited good little girls and boys to attend a most wonderful party.  Good witches work hard and shower children with love.

IMG_8817

A Black, Red Eyed Rat

ready to bite anyone who went upstairs.

IMG_8818

Gorgeous light, draped in the blackest netting……….

IMG_8819

The table was set with skeleton cups from the dollar store, pumpkins, black garland over a sparkly gold table runner, orange pumpkin paper plates. . . . . .

IMG_8820

IMG_8836

IMG_8837

Cobwebs completed the look.

IMG_8838

IMG_8829

“Each day of our lives we make deposits in the memory banks of our children.”
— Charles R. Swindol

IMG_8830

“The soul is healed by being with children.”
— Fyodor Dostoyevsky

IMG_8828

“I added touches of sparkles–they always pop at a party–and the kids love the little details, too.”

23130882_10155583814276343_3848335646147194532_n

These spiders could be clipped on anything and were a favorite item from Michael’s.  She found most of her decorations at Michael’s and Dollar General.  She bought the spray paint (must be oil based so it sits on the water for the hydro-dipped pumpkins) and the piñata from Walmart.

Come to the party, four o’clock on Saturday, said the invitation sent by Magical Text Messaging.

IMG_8834

IMG_8835

IMG_8822

The children had so much fun!  They hit a piñata, and either carved or painted their pumpkins.

IMG_8821

IMG_8827

Aunt Amanda-Witch thought of everything, she had even researched Youtube for exciting ways to paint the pumpkins.  Search HYDRO-DIPPED pumpkins and MELTED CRAYON pumpkins.

IMG_8825

And then there was a boys against the girls Bobbing for Apples contest!

IMG_8833

IMG_8832

IMG_8826

They ate donuts off strings!

There was also Halloween music playing (iTunes kid bop Halloween), a cheerful campfire, string of lights, and yummy s’mores for when it became dark outside.

IMG_8831

And a very spooky menu:

Mummy Hot Dogs
Veggie Skeleton
Ghost Fruit Kabobs
Zombie Boogers
Mummy Mini Pizza
Deviled Spider Eggs
Spooky Jello Jigglers
Dirt Worm Cups
Apple Cider with Eyeball Ice

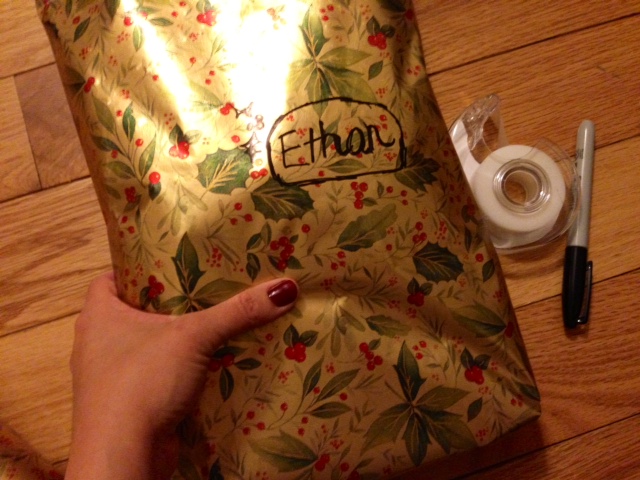
At the end of the party, each guest received a special gift bag to take home, along with a caramel apple and their pumpkin.

Aunt Amanda-Witch and her husband Uncle Jason-Warlock really outdid themselves with this special party.  The children absolutely LOVED it.  When we had to leave, Sarah ran and frantically questioned Aunt Amanda-Witch if she was going to give any more parties sometime.  I think Aunt Amanda Witch should consider a side-job in party planning, don’t you?

What we remember from childhood
we remember forever —
permanent ghosts,
stamped, inked,
imprinted, eternally seen.
~Cynthia Ozick


SaveSaveSaveSave

boredom buster for all ages!

I wasn’t feeling well on Saturday so Rich took all the children out for a few hours so I could rest. David stayed home with me because he loves spending Saturdays at home in his own little world of creativity and good wholesome fun that involves things like balloons, vinegar, cornstarch, food coloring, yarn, wooden Thomas the train tracks, and empty play dough buckets.

DSC_1389

He was so utterly interesting that I got off the couch and sat next to him on the floor.  He was attempting to catch a bird.  He’s been catching birds for about 6 years now.  He doesn’t do it on a constant basis, just when the mood strikes.  We had a lot of bird activity at the feeder on Saturday and when David stopped and noticed them,  the mood struck once again.

DSC_1399

I typically have a terra cotta planter on this little table, filled with sunflower seeds.  David removed the planter and put a pile of seed underneath a big play dough bucket.  He propped up the bucket with a train track and tied a long piece of yarn to it.

DSC_1392

The little table with the bird seed is only about five feet from the side entry way door.  The storm door is full length glass so David ran the yarn under the door and sat right on the other side of it with the end of the string in his hands, which were charmingly dirty from other experiments.

I sat next to him with my camera and a piece of paper to jot down his quotable quotes.  Everything he said made me laugh.

DSC_1409

This chickadee landed on the track and knocked it over, causing a loud groan from Dave.

He went out to set things in order again.

DSC_1398

Whenever there was a “misfire” he would go out loudly apologizing to the birds.  “Everything is okay….that was supposed to happen!”  He wanted to make it clear to the bird community that there was nothing to get suspicious about.

“I love to do this,” he told me as he settled back down with the string in his hands.

He had to get up to brush the seeds completely UNDER the bucket because they were choosing seeds that were in safer locations……”Now they’re dedicated to go all the way under there.”

DSC_1399

He was very patient.  Much more than I.  A bird would come and I would say, “Why didn’t you pull the string?”

“I couldn’t!  It wasn’t all the way under.  I don’t want the edge to come down on the bird’s neck and break it!”

Hearing this piece of wisdom made it easy to bring the conversation around to the subject of the guillotine.  “What’s that?”  He asked, with his eyes on the bucket.  “When you lay down and they let the sharp metal fall on your neck.”  “Oh yeah.  I hate those!”  I laughed, imagining that this hatred was typical of the whole of humanity.

He was also very careful because if he killed one right in plain sight of the other birds they would never come back around to the feeder, he said.

DSC_1401

After another miss, he sat down and immediately another bird came around.  He was astonished.  “Mom, look at this.  Stupid birds, they go right back.  Fool birds.  That’s what I call them.  Fool Birds.”

“I have to wait for one to stall, then I’ll get it.”

“I love to do this.”  He was all smiles.  “It’s like fishing, hunting, and trapping.”

DSC_1417

He caught one.

DSC_1421

He took a clipboard (you could also use cardboard or whatever) to put on top of the bucket.  He wasn’t planning on holding it but I encouraged him.  He was shaking a little as he tried to gently catch it in his hand.

DSC_1426

“He is the hero of the woods; there are courage and good nature enough in that compact little body, which you may hide in your fist…….”  Ernest Ingersoll

DSC_1424

“Thus it is, that in all the lands of snowy winters the chickadee is a loved comrade of the country wayfarer; that happy song ‘chick-a-dee-dee-dee’ finds its way to the dullest consciousness and the most callous heart.”  Anna Comstock

DSC_1428

DSC_1432

The little chickadee was a brave fighter.  He bit Dave’s thumb and held on tight.

DSC_1436

I got to hold it, too, and then we let it fly away.  He caught three that day.

Now that you know how Dave catches birds, you can try it too!  Let us know how it goes.  It’s a great activity for anyone, old or young.

DSC_1445

This morning I found Dave peeling a balloon off of a big ball of ice.  He had made a water balloon and put it in the freezer over night.  He was surrounded by siblings as he peeled it.  It wasn’t frozen all the way, so he trotted it back to the freezer……


handmade (day 1)

Since childhood, I’ve been surrounded by creativity, by “makers”.  Grandparents, aunts, and mom especially.  It seemed as though every visit with family involved an informal show and tell, and every Christmas or Birthday involved a handmade gift or two.  As I think back on those days I realize how much those times influenced me, even when I was little and focusing more on play than on what the grown ups were doing.

Consequently, I have grown up into a profound respect and appreciation for a variety handmade items and find that the things made by individual people move me in ways no factory made item could.  For example, if you take an item purchased from Target and place it by the side of the same type of item made by your friend or neighbor, the handmade wins every time. It oozes with an aura of thoughtfulness, love, personality, giving of time and energy, and warmth.

There is a spiritual element to the handmade, too.  One of the names for God is Maker.

On Saturday, we had a nice day-long visit with my parents, beginning with the unwrapping of gifts.

The first thing I opened was a beautiful wooden box that Dad constructed and Mom beautified.  It was so meaningful that they made it together.

DSC_1224

They used a seashell for the top that matches the color and grain of the wood.

DSC_1229

I wondered as I opened it why it was so heavy.

DSC_1231

Gently lifting the lid, I discovered fiesta coasters to match my collection of dishes!  There were nine of them, one for each member of the my family.

DSC_1232


Underneath the coasters was another thoughtful touch. The bottom was lined with an old map of my hometown, including the location of Rich’s and my first house.

This simple wooden box is a priceless gift and one that I am honored to have received from my parents.  I will happily use it to beautiful my home, and hold coasters.

DSC_1210

DSC_1237

“Everyone who has any talent at all in sketching, painting, sculpturing or carving, should have the opportunity to use that talent. The expression is important for the person, and can tremendously enrich the lives of other people. What can you do?”  Edith Schaeffer


how to make homade slime (his own spelling)

DSC_0996

What a great morning this has been, sun shining and so much accomplished like laundry, cleaning bedrooms, dishwashers, and matching tons and tons of socks.  I started a new photo album on FB of my church family, which I’ve wanted to do for a while.  And Sarah Joy had a bath.  She is feeling much better today for which we are thankful.  Everyone has had the stomach bug except Ethan and Rich, time will tell!

Aunt Colleen made an apron out of old blue jeans yesterday!  We were messaging on FB and she inspired me to make Sarah a purse out of the jeans I ripped when I fell on my knee.  Here are pictures:

The apron:

10945959_10204537805542635_924852306_n

and the little purse made out of the back pockets sewn together back to back:

IMG_6661


When Sarah woke up I gave her the purse and she said a soft “thank you, mama.”

Sewing is great but what about something else to make?  Like a science project?  I’m constantly growing mold in the fridge and the shower, but lately I’ve been in the mood to do something more challenging and this is the area in which Davy-do has become my inspiration.  Perhaps you too would like to do a simple science project.  How about homemade slime?

Here is Davy’s original recipe, with original spelling.  He was so kind to write it all up for the blog.

What you will need

1.   1 1/2 T. of elmers glue
2.  laundry detergent
3.  food coloring (optional but your choise of color.)
4.  water
5.  flour
6.  1 bowl

Steps!  Put your 1 1/2 tablespoons of glue in the bowl then pour 1/4 of a cup of water in it, then put 1 tablespoon of laundry detergent in it.  Next let it sit for 2 minutes, then pour it all out on a flat surface that you don’t want wet, quickly scoop up your slime and put in a small container, nows the time to put 2 drops of food coloring in it and store if you want it thicker add flour, the more you put in the thicker it will be.

I have so many questions!

And a few opinions.  One of which, as a mom, I do not suggest allowing the food coloring to be used.  It’s just really stressful.  Also, the laundry detergent is not a good idea.  My little scientist used so much that my hands felt funny after one touch of the slime….also, doing laundry now gives me flash backs to the slime situation, because of the aroma.  Other than that, you’re good to go with this one.

He moved on to recipes from outside sources, all of which used GEL & CLEAR ELMER’S GLUE(s) and borax.  I have gotten him about 7 containers of glue so far and he has had the most wonderful time making slime.  We have it in baggies and bowls all over the place but he still doesn’t let the little kids play with it. (he is very possessive of his slime!)   The recipe is here.

DSC_0995

DSC_0993

And/Or you can make a rubber egg.  This was sooooo weird.  He let the egg soak in vinegar all day long and the shell turned rubbery.  He loved his rubber egg so much but I accidentally dropped it on the floor after playing with it.  It broke, the dog ate it, and he will never let me hear the end of it.

IMG_6667 IMG_6666 IMG_6665 IMG_6664 IMG_6663


more information here.

Last but not least he has been making “instant ice” with FIGI bottled water.  He requested FIGI water one day and I forgot to get it at the store so after I dropped off Ethan at school I had to go to the store AGAIN because I was afraid of disappointing my little scientist.  Thankfully the local grocery store had it in stock.

Here is the fun explanatory video on “instant ice”: click here

Dave loves to watch youtube videos to inspire him to try different experiments.  I can’t wait to see what he tries next!


family gift wrapping: practical tips

Wrapping gifts can be draining, so I thought I would share how I make the process as simple and enjoyable as possible.

santa2

1.   Use only one extra big roll of wrapping paper at a time.  Keep using this one roll until it runs out.

2.   You also need a nice fresh roll (or two) of good tape, a pair of sharp paper scissors, and a black sharpie marker.

3.   When wrapping the gift, unroll the paper, place gift upon paper to measure, and always cut straight across, leaving a nice edge on the roll for the next gift.

DO NOT DO THIS:

santa3

4.   If the gift is small and you need to cut away any extra paper, do so.  Keep any trims in a “trim pile” to use for more small gifts.

santa4

5.   Don’t be stingy with the tape.

santa6

6.   No need for labels, simply write the name of your child ON the package.

7.   No need for gift boxes.  If you have clothes to wrap, just fold the item neatly and wrap it.

8.   If you must embellish, buy a big bag of bows and add them to the gifts on Christmas Eve.

9.   You might think that pretty gift bags with tissue paper will simplify the process, but I have found that whenever I use gift bags I can’t help getting pathological about saving them.  It’s much easier to throw away paper on a Christmas morning.

10.  Keep a running list on your iphone of the gifts you have wrapped. This will be important later on, when husband gets worried that a child might not have as many gifts as their sibling.  (avoid last minute shopping at the gas station!).

santa7

11.  After wrapping the gifts, pile them up in boxes or big bags to store away until Christmas.

santa5

12. Keep inner peace while wrapping by listening to music, keeping your cat with you, painting nails deep red a few hours before hand, eating some of the extra stocking candy, and making your husband stay out of the room so he can keep the children out of mischief.

my rusty cast iron skillet

Before:


I mentioned last week that I had been organizing my kitchen cupboards. 

Imagine my surprise when I rediscovered one of my cast iron skillets, only to find it covered over in a layer of dismal rust.

Unlike the cheap nonstick cookware of today, well taken care of cast iron will last forever, so, I set about repairing my orange iron skillet.


It already looked much much better after a hard scrubbing with soap, hot water, and a stainless steel scrubbing pad; all the rust came off.

Then, I dried the skillet, poured in some vegetable oil and rubbed it in thoroughly.

After rubbing it with oil, I baked it in the oven with it’s little sister, which I also re-coated with oil.  I used a 350 degree oven and left them alone until I noticed that the oil had baked in nicely (an hour or so)…..


After:

Just look at the difference.  The larger pan was the one previously covered in rust.  It came out of the oven black and reseasoned perfectly.

I used the pan for my breakfast omelet this weekend and it cooked wonderfully.  Cast iron heats evenly and retains heat nicely, too. 

A well-seasoned iron skillet is practically nonstick, and never needs to be scrubbed.  I used a wet dishcloth to wipe out any leftover egg bits and then dried it with a paper towel.  I always try to leave or add clean grease, to keep a nice coating for next time. 

It will never rust unless you are dumb and throw it in the back of a cupboard wet and then leave it for a year.

You don’t have to use as much butter and oil when using cast iron.

Also, another interesting fact is, if you cook with cast iron pans you will end up with iron fortified food.  Which is a very good thing, indeed.

See:  3 Health Reasons to Cook with Cast Iron

For a lot more information about cast iron, see: Lodge Cast Iron Cookware


~how to make a cornbag~

(A corn bag is a fabric “pillow” filled with feed corn instead of stuffing.  After 2 minutes in the microwave, the corn bag becomes toasty warm and lovely to put in the bottom of your blankets at bedtime to warm up cold toes.  You could also put it in the freezer for comforting a headache.)

The other day, I gave away a corn bag here on my site and some of you asked me if I could show you how to make one.  They are so easy that I feel dumb even trying to explain it.  I believe anyone could make one, even if you don’t have a sewing machine.  It would take no time at all to hand sew one for yourself.

The most difficult part for me, was locating the corn needed to fill the bags.  You will need feed corn and I found some at a local AGWAY store, it was 2.99 for a five pound bag.

See?  Whole feed corn.

DSC_9591

You can make the size of your corn bag as big or small as you wish.  Today, I cut a piece of flannel that was 21 inches by 12 inches.  I recommend using a nice, BEAUTIFUL, thick piece of flannel.

DSC_9607

Fold your fabric in half, edge to edge, wrong side out.  And pin.

DSC_9610

Use your sewing machine to sew around the edges, leaving enough room at the end to turn it right-side out, and to fill it.

DSC_9620

DSC_9624

After filling it about HALF way with corn, turn the edges of the remaining hole in, and pin together

DSC_9626

Sew the seam together with your machine, keeping close to the edge and making sure that you do not leave any size hole whatsoever, or you will be leaving corny bits where ever you take your bag.

DSC_9627

Your corn bag is all done!  Now you can use it.

DSC_9644

Microwave for about 2 minutes to make it nice and warm.  Thanks, Mom, for scrubbing out my microwave while you were here.  It’s because of you I could take this photo without shame.

DSC_9646

Carry your bag away and warm your feet with it.  It also feels nice on your lower back, if you have a back ache.

Someone told me that you could also put one in the freezer, to put on your head, if it aches. 

DSC_9652

Ridiculously easy, don’t you think?  Now, if you want to make a label for yours, just go ahead and embroider a word or phrase on a piece of different fabric.  I used 4 strands of embroidery floss the other day when I made mine.  I sewed the label on by hand, using the same embroidery floss, before I sewed up the seams to make the bag.

This is the label I did the other day:

DSC_9280

For this cornbag:

DSC_9278

If you have any questions, feel free to ask.  I hope I did okay at explaining.  I don’t see how you could go wrong, however, unless you use pop corn to fill it.  Don’t do that. 

Have fun!